Friday 2 September 2011

Oracle BI Server Features

OBI Server is not mere SQL Generator:


SQL is generated by Oracle BI Server against the data sources using the data source connection, information from the repository, and database-specific parameters stored in a DBFeatures.ini file. Thus, Oracle BI Server is not just a SQL generator. It determines the best source and the optimal way to access data. In some cases, Oracle BI Server takes on operations that are more efficient for it to perform rather than the host data source.


View the original article here

Purging OBI Server and Presentation Server Cache:

Purging BI Server Cache:


• BI Server cache is stored in the directory: d:\Oracle\OracleBIData\cache • Create the script called PurgeBICache.sql with following command:


Call SAPurgeAllCache ();


• Run the following command to invoke the script and clear the cache: nqcmd -d AnalyticsWeb -u Administrator -p Administrator -s PurgeBICache.sql -o purge_clear.log


• This will clear all the BI server cache entries for all the users.


Purging BI Presentation Server Cache:


        Presentation cache stores the finished report output in the presentation server. This is different from BI server cache. BI server could be leveraged by multiple users and reports depending on whether they are accessing similar or subset of the cached data, though from a different reports.


 Presentation cache is report specific and user specific cache entries residing in the D:\OracleBIData\tmp\ folder.


The expiry of this entry can be governed by following instance-config.xml file in <>\web\config directory:


CacheMinExpireMinutes Default 10


CacheMaxExpireMinutes Default 15


View the original article here

OBI Authentication:

Authentication Options:


Oracle BI Server supports the following authentication types:


Operating system


When operating system authentication is enabled, users connecting to Oracle BI Server should not type a user ID or password at the logon prompt.If a user enters a user ID and (optionally) a password at the logon prompt, that user ID and password overrides the operating system authentication and Oracle BI Server performs the authentication.
To configure operating system authentication:
1. Enable operating system authentication in the NQSConfig.ini file.
2. Create a user in your repository named identically to the user ID in the trusted Windows domain.
3. Assign the group membership and rights that you want the user to have.


External table


• Instead of storing IDs and passwords in a repository, maintain lists of users and passwords in an external database table.
• Use Oracle BI session variables to get values.


 LDAP


 Database


Authenticates users through database logons
• To set up database authentication:
– Store user IDs (without passwords) in a repository.
– Import database to the repository.
– Specify authentication database in NQSConfig.ini.


 Internal


Maintain lists of users and passwords in the repository using the Administration Tool.
• Oracle BI Server authenticates against this list unless:
– Another authentication method has already succeeded
– Database authentication is specified in NQSConfig.ini


Order of Authentication
1. Operating system (OS):
– No logon name
– Turned on in NQSConfig.ini
2. LDAP or external database table
– Populates session variables
3. Internal or database


Bypassing Oracle BI Security
It is possible to bypass Oracle BI Server security and rely on the security that is provided by issuing user-specific database logons and passwords.


View the original article here

OBIEE Naming Best Practices

Below is the obiee naming best practices:


The rules for naming of items in Analytics:


a.    Be consistent – follow a format and stick with it


b.    Be descriptive – make the meaning clear in the name


c.     Be concise – don’t go overboard with descriptive names


d.    Include Units of Measure – for metrics and numerical attributes


Try to include the aggregation rule in the name of the metric to allow easy identification of what the metric is doing.


·        Counts can use the # sign as in # Cases


·        Averages or ratios can be used as in Avg. # Open Days


·        Sums may be shown as Totals as in Total Shipped Units


·        Mins/Maxes as in Max # Shipped Units


Be very precise in the language to convey the meaning of the metric and what it is measuring:


·        # Cases Opened means something different that # Open Cases.  The former refers to a number that occurred in the past that will not change as cases close, where the latter is a current snapshot of open cases that will eventually change.


For Logical tables, the name must represent the logical role


·        Account Monthly Average Sales is a different logical entity than Account Weekly Average Sales, and as such there should be two distinct logical tables with these names.  Similar examples may include: Adapted Account vs. Registered Product and Manager vs. Employee


A general rule of data modeling is to not name attributes with the name of the entity.  For example, in an Account table, don’t have columns such as


·        Account Name


·        Account Address


·        Account Phone #


This is redundant because the fields are already organized in the Account table.  Instead, just have the following fields:


·        Name


·        Address


·        Phone #


An exception can be made for attributes whose proper name happens to include the table name.  For example, Account Number is an attribute name that should not be split, as Number by itself typically does not have any meaning.


Consider adding certain units of measure to a metric to clarify what is being measure to a user.  A metric called


·        Coverage Met does not convey enough information.  Is Coverage Met measured in weeks or days or %? Try 13 week Coverage Met or # Coverage Met


For currency metrics, consider appending the unit of currency to the metric name.


·        For example, instead of Sale Amt, consider using Sale $ or $ Sale


·        Possibly consider using Sale Amt USD for multi currency environments.


View the original article here

Repository Modeling – Tips , Key points etc.,

When Complex Join in Physical Layer ?

You can use the Physical Diagram feature to create joins between physical table objects. Note that complex joins can be used in this layer to express the relationships that do not involve a primary key–foreign key relationship. When you create a complex join in the Physical layer, you can specify expressions and the specific columns on which to create the join. When you create a complex join in the Business Model and Mapping layer, you do not specify expressions.
Why Complex Join in Logical Layer needed ?
- Logical complex joins are used to define join relationships in the BMM layer. A complex join tells Oracle BI Server that it can make the best decision about what exact Physical SQL to generate based on a logical query request. This is in contrast to a foreign key join in the BMM layer, which forces the server to use only that single physical join path between the two tables, even when a different path would be far more efficient.
-  The capability to create logical foreign key joins in the BMM layer is in the Administration Tool to provide backward compatibility with previous releases of the product.
Presentation Layer in RPD:
Organize and simplify the business model for a set of users
Single catalog must be populated with content from a single
business model; cannot span business models.
- Multiple catalogs can reference the same business model.
Aliases in Presentation Layer:
- An Aliases tab appears on the Presentation Catalog, Presentation Table, and Presentation Column property dialog boxes. If you modify a Presentation layer object, this tab keeps track of any prior names. Aliases are used to maintain compatibility with previously written queries after an object has been modified. You also can use this tab to specify or delete an alias for the Presentation layer objects.
- Best practice is to rename objects in the Business Model and Mapping layer and to minimize renaming in the Presentation layer.
 Why Validating a Repository is a necessary:
• All logical columns are mapped directly or indirectly to one or more physical columns.
• All logical dimension tables have a logical key.
• All logical tables have a logical join relationship to another logical table.
• There are at least two logical tables in the business model:
a logical fact table and a logical dimension table. Both can map to the same physical table.
• There are no circular logical join relationships.
• A presentation catalog exists for the business model.
 What is the use of Dimension Hierarchies ?
• Introduce formal hierarchies into a business model
• Establish levels for data groupings and calculations
• Provide paths for drill down 
 Why is Implicit Fact Column needed?
Dimension-only queries with columns from more than one dimension may not return the desired results.
• In a business model with conforming dimensions, many fact tables may join to the same dimensions.
• For dimension-only queries across multiple dimensions, Oracle BI Server picks the most economical fact table source based on the number and levels of joined dimensions.
Alternate for Connection Pool:
Logons
To specify specific database logon IDs for one or more databases, enter the appropriate user IDs and passwords for the user in the Logons tab of the User dialog box. When the connection pool omits the username, these usernames and passwords are used. Otherwise, these entries are ignored.
Administrator Account
• Is a default, permanent user account in every Oracle BI Server repository
• Cannot be deleted or modified other than to change the password and logging level. Any query issued from the Administrator account has complete access to the data; no restrictions apply to any objects.
Security Group Inheritance:
• Privileges granted explicitly to a user have precedence over privileges granted through groups.
• Privileges granted explicitly to a group take precedence over any privileges granted through other groups.
• If security attributes conflict, a user or group is granted the least restrictive security attribute.


View the original article here

Connection Pool

- A connection pool contains information about the connection between Oracle BI Server and the data source. The connection pool contains data source name information used to connect to a data source, the number of connections allowed, timeout information, and other connectivity-related administrative details.
- Connection pools allow multiple concurrent data source requests (queries) to share a single database connection, reducing the overhead of connecting to a database.
- For each connection pool, you must specify the maximum number of concurrent connections allowed.
- After this limit is reached, the Oracle BI Server routes all other connection requests to another connection pool or, if no other connection pools exist, the connection request waits until a connection becomes available.
 - It is recommended that you create a dedicated connection pool for initialization blocks. There is at least one connection pool for each data source.


View the original article here

NQS Config

- If the repository file name contains a space, enclose the file name within single quotation marks.

- If multiple repositories are specified as the default repository, the last one listed becomes the default repository.
- Any line beginning with a pound sign (#) will be treated as a comment


View the original article here

Alerts for the Oracle BI Delivers

Alerts for the Oracle BI Delivers :

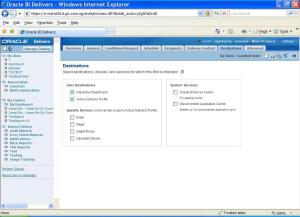
This is about creating alerts for OBI delivers.

Go to Destination Tab – > Check Interactive Dashboard. It is very simple.

Interactive Dashboard

Active iBots will appear in a Dashboard Alerts section as well as on the Alerts! page. A link to this summary appears together with the application navigation links when new iBots are delivered. After these are cleared on the Alerts page, the alert link is removed.

Be the first to like this post.This entry was posted on April 14, 2011 at 9:36 am and is filed under OBI Delivers. You can follow any responses to this entry through the RSS 2.0 feed. You can leave a response, or trackback from your own site.

View the original article here


View the original article here

OBIEE Patch for nQSError: 37005

Oracle Support released a patch for the [nQSError: 37005] Transaction update failed error.

This was “randomly” generated in OBIEE 11g during the check-in, in the Administrator Tool, of an online opened repository and it was very
annoying.

The patch number is 9884975 and can be downloaded from the Oracle Support site.

You have to ask the patch password by opening a new Service Request in order to download it.


View the original article here

Cache Management Techniques

Cache:


Oracle BI Server can be configured to maintain a disk-based cache of query results sets:
• Saves the results of queries in cache files
• Enables Oracle BI Server to satisfy subsequent query requests without having to access back-end databases


Overhead because of Caching:
• Disk space
– Query cache requires dedicated disk space.
• Administrative tasks:
– Set the cache persistence time appropriately.
– Purge the cache when necessary.
• Keeping the cache up-to-date:
– Evaluate what level of noncurrent information is acceptable.
– Remove stale data.


Cache Management Techniques
• Configuring the cache parameters
• Setting caching and cache persistence for tables
• Using the Cache Manager
• Inspecting SQL for cache entries
• Modifying the Cache Manager column display
• Inspecting the cache reports
• Purging the cache entries manually using the Cache
Manager
• Purging the cache entries automatically
• Using event polling tables
• Seeding the cache


Cache Hit Conditions
A cache hit occurs only when certain conditions are met, such
as the following:
• Query WHERE clause constraints need to be equivalent to the cached results or to a subset of the results.
• All the columns in the SELECT list of a new query must exist in the cached query or they must be able to be calculated from the columns in the query.
• Join conditions must be equivalent.
• Queries that request an aggregated level of information can use cached results at a lower level of aggregation.


View the original article here

Wednesday 24 August 2011

Obiee – A special subject area to handle the dashboard parameters prompts


All the prompts in OBIEE are column based prompt. You can’t create a prompt if you don’t select a column. And as it’s the only way to set up a variable for a formula, it’s impossible to bypass this constraint.


In our case, we don’t care about the value in the dimension column as we want parameter values as for instance the hierarchy level :


{{:dat:obiee:presentation_service:obiee_parameter_prompt_result.jpg|}}


The idea behind the scene is :
– to create a column which is on the top of a dual view (or skinny table) in the physical layer.
– to create a dummy business model because BI Server requires us to have a minimal of one logical join.
– to create a special subject area (presentation catalogue) to separate the functional of the parameters columns
– to be able to choose this column in order to create one or several others parameter prompts.


The advantages of this solutions are that :
* as you query a skinny table (or dual view), the performance are very good
* as you use a column, you can translate in other languages the label of the parameter prompt
* you can add a parameter value without changing the original dashboard prompt


===== Creation of the Parameter Table =====


In this example, we show the creation of a parameter table with a dual view but you can choose to create a table to store your parameters.


* In the physical layer, right click on a physical schema and choose New Physical Table
* select “Select” as Table Type from the drop down menu
* and enter the Sql below


Example :


SELECT ‘MONTH’ AS REPORT_LEVEL FROM DUAL
UNION
SELECT ‘QUARTER’ AS REPORT_LEVEL FROM DUAL


{{:dat:obiee:presentation_service:obiee_dummy_table.jpg|}}


Second, you need to create the column report_level from the sql statement.
* click on the column tab and create it


{{:dat:obiee:presentation_service:obiee_dummy_table_columns.jpg|}}


If you choose this column in a query, the values MONTH and QUARTER will be returned.


===== Creation of the Business Model Layer =====
* Drag and drop **TWO** times this table in order to create two logical table source :
* Parameters1
* Parameters2
* Select this two tables,
* Right click / Business Model Diagramm / Selected Tables only
{{:dat:obiee:presentation_service:obiee_dummy_business_model.jpg|}}
* and create a new complex join between them.
{{:dat:obiee:presentation_service:obiee_dummy_model_2.jpg|}}


This step is important beacause Obiee require that a fact table has minimum one complex logical join


===== Creation of the Presentation Catalog =====
* Right click in the presentation layer / New Presentation Catalog and name it Parameter
* Just drag and drop one of the two logical table and you are done.
* You can cache this new presentation catalog to the others users by giving the correct privilege. In the Oracle BI Presentation Dashboard / Administration / Manage Privileges.
* Reload the metadata in the BI Presentation Dashboard in Administration / Reload Files and metadata


{{:dat:obiee:presentation_service:obiee_parameter_subject_privilege.jpg|}}


In the picture above, you can see that only the Presentation Server Administrator have the right to the Parameter Area but everybody can use a object (report, prompt) create with it


===== Creation of the dashboard prompt =====


Now that we have our parameter column in our parameter subject area, it’s possible to choose it in order to create a parameter prompt.


* Go to answer
* Click on the icon : New Dashboard prompt on the left side
* And select the subject area Parameter
{{:dat:obiee:presentation_service:obiee_new_dashboard_prompt.jpg|}}
* in the left frame, select the column of the select table (in our case report_level)
* and define the options that you need as the setting of a presentation variable
{{:dat:obiee:presentation_service:obiee_parameter_prompt.jpg|}}
* and you get :
{{:dat:obiee:presentation_service:obiee_parameter_prompt_result.jpg|}}


===== What about now if I don’t want MONTH and QUARTER but MONTH and YEAR ? =====


You can change the values in your parameter table or you can use the SQL value capabilities of the prompt :
* Go back to your prompt
* select SQL Value in the show result
* and tape this SQL :


SELECT CASE WHEN 1=0 THEN Parameters.REPORT_LEVEL ELSE ‘MONTH’ END FROM Parameter
UNION
SELECT CASE WHEN 1=0 THEN Parameters.REPORT_LEVEL ELSE ‘YEAR’ END FROM Parameter


As one is always different of zero, you will obtain MONTH and YEAR as value in the drop down list.


You can not enter this SQL :


SELECT ‘MONTH’ FROM Parameter
UNION
SELECT ‘YEAR’ FROM Parameter


because Parameter describe a presentation catalog and not a table. In the Sql of OBIEE, you really need to have for each column the name of the table otherwise you will obtain this error :


Error Codes: OPR4ONWY:U9IM8TAC:OI2DL65P
State: HY000. Code: 10058. [NQODBC] [SQL_STATE: HY000] [nQSError: 10058] A general error has occurred.
[nQSError: 42021] The query does not reference any tables. (HY000)
SQL Issued: SELECT ‘MONTH’ FROM Parameter


===== Performance =====
As we use a dual or a skinny table as source table, the performance are really good.


===== Conclusion =====
You can add to your parameter subject area one column by parameter or you can change the values with the SQL capabilities from the prompt. In the two case, a sql statement against a little table of Oracle is performed and doesn’t therefore require to read data by an I/O operation on a disk. You can therefore choose your preferred solution but keep in mind that one column for one dashboard prompt is the natural Obiee mechanism and permit a good translation in other languages.


View the original article here

OBIEE – Dimension fragmentation design to add an automatic filter with the choice of a column


In response to an original Idea of Venkat with this blog entry: [[http://www.rittmanmead.com/2010/02/13/oracle-bi-ee-10-1-3-4-1-puzzlers-puzzle-1/|Puzzlers – Puzzle 1]]


“How do we make BI EE to generate different filters for every column(within a dimension) chosen from Answers?”


The idea is when you add the column Channel desc to an answer the query must be automatically filtered.


You can also found a copy of this entry in the wiki : [[http://gerardnico.com/wiki/dat/obiee/dimension_fragmentation_filter|OBIEE - Dimension fragmentation design to add an automatic filter with the choice of a column]]


An other simple solution to achieve this goal is to use the security filter:
[[dat:obiee:bi_server:security:security_automatic_filter_on_column]]


After a good night of rust, I deleted the alias of the physical table Channels because this solution creates a self join on the table channels. You can see the old solution [[dat:obiee:dimension_fragmentation_filter#the_old_solution|here]]


===== The design =====
*- Suppress the old logical column “Channel Desc”, create a new one with the same name
* 1 – Create a new logical table source “CHANNELS_FILTER” in the logical table Channels
* 2- Map the new logical column Channel Desc to the physical Column Channels.”Channel Desc” in the tab “Column Mapping”
* 3- Add the filter in the content tab
* – Drag and drop the new logical column in the presentation layer


{{:dat:obiee:repository_design_filter_on_column_new_logical_table.jpg|}}


===== The result =====


==== With the column “Channel class” and “Amount Sold” ====
**Sql Request**


SELECT Channels.”Channel Class” saw_0, “Sales Facts”.”Amount Sold” saw_1 FROM SH ORDER BY saw_0


{{:dat:obiee:repository_design_filter_on_column_result1.jpg|}}


As you can see no filter is added to the database query.


**Database Query**


select T161.CHANNEL_CLASS as c1,
sum(T245.AMOUNT_SOLD) as c2
from
SH.CHANNELS T161,
SH.SALES T245
where ( T161.CHANNEL_ID = T245.CHANNEL_ID )
group by T161.CHANNEL_CLASS
order by c1


==== With the column “Channel desc” and “Amount Sold” ====
**Sql Request**


SELECT Channels.”Channel Class” saw_0, Channels.”Channel Desc” saw_1, “Sales Facts”.”Amount Sold” saw_2 FROM SH ORDER BY saw_0, saw_1


By adding the column Channels.”Channel Desc”, OBIEE add automatically a filter and the join between the original table channel and its alias


{{:dat:obiee:repository_design_filter_on_column_result2.jpg|}}


**Database Query**


select T161.CHANNEL_CLASS as c1,
T161.CHANNEL_DESC as c2,
sum(T245.AMOUNT_SOLD) as c3
from
SH.CHANNELS T161,
SH.SALES T245
where ( T161.CHANNEL_ID = T245.CHANNEL_ID and T161.CHANNEL_CLASS = ‘Direct’ )
group by T161.CHANNEL_DESC, T161.CHANNEL_CLASS
order by c1, c2


==== With the column “Channel desc” and “Channel class” ====
**Sql Request**


SELECT Channels.”Channel Class” saw_0, Channels.”Channel Desc” saw_1 FROM SH ORDER BY saw_0, saw_1


**Database Query**


select distinct T161.CHANNEL_CLASS as c1,
T161.CHANNEL_DESC as c2
from
SH.CHANNELS T161
where ( T161.CHANNEL_CLASS = ‘Direct’ )
order by c1, c2


View the original article here

OBIEE 10g Vs OBIEE 11g

The security policy for Oracle Business Intelligence 11g defines what individual users and users with certain application roles can access and do. In Oracle Business Intelligence 11g, the security policy definition is split across the following:


Presentation Catalog – this defines which catalog objects and Oracle BI Presentation Services functionality given users and application roles can access.


RPD – this defines which application roles and users have access to which items of metadata within the RPD. You define this security policy in the Administration Console.


Policy Store – this defines which Oracle Business Intelligence Server, Oracle Business Intelligence Publisher and Real Time Decisions functionality can be accessed by given users or users with given application roles. Use Oracle Enterprise Manager to configure the default Oracle Business Intelligence Policy Store.


Oracle Business Intelligence10g and 11g security models differ in the following areas:


Defining users and groups – in Oracle Business Intelligence 10g, it was possible to define users and groups within a repository file using the Oracle BI Administration tool. In Oracle Business Intelligence 11g, you can no longer define users and groups within a repository. The Oracle Business Intelligence Enterprise Edition Upgrade Assistant migrates users and groups from a 10g repository into the embedded LDAP server in an 11g installation.


Defining security policies – in Oracle Business Intelligence 10g, security policies in the Web catalog and repository can be defined to reference groups within a directory. In Oracle Business Intelligence 11g, security policies are defined in terms of application roles, which are in turn mapped to users and groups in a directory. This allows an Oracle Business Intelligence 11g system to be deployed without changes to the corporate directory and eases movement of artifacts between development, test and production environments.


Use of the Administrator user – in an Oracle Business Intelligence 10g installation, a special user named, Administrator has full administrative permissions and is also used to establish trust between processes within that installation. In Oracle Business Intelligence 11g there is no special significance to the name Administrator and there can be one or more users who are authorized to undertake different sets of administrative functions. In Oracle Business Intelligence 11g the identity used to establish trust between processes in an installation is configurable and independent.


Repository encryption – in Oracle Business Intelligence 10g, certain sensitive elements within a repository are encrypted. In Oracle Business Intelligence 11g, the entire repository is encrypted using a key derived from a user supplied password. An 11g repository can only be opened with the password, and there is no mechanism to recover a lost password.


The following aspects of the Oracle Business Intelligence 10g security model remain in 11g:


Oracle Business Intelligence Server Initialization Blocks – Oracle Business Intelligence Server 11g continues to support the use of initialization blocks for authentication and authorization. In 10g Oracle Business Intelligence Server falls back to use initialization blocks if a matching user cannot be found in the repository. In 11g Oracle Business Intelligence falls back to use initialization blocks if the user cannot be authenticated by the installation’s configuration authentication provider.


Presentation Catalog Groups – Oracle Business Intelligence 11g continues to support the definition of catalog groups within the presentation catalog. These groups are only visible within Oracle Business Intelligence Presentation Services. Oracle recommends that presentation catalog groups be used for backward compatibility only and that application roles be used instead for new installations.


SA System Subject Area – Oracle Business Intelligence 11g supports the use of SA System Subject Area in combination with Oracle Business Intelligence Server initialization blocks to access user, group, and profile information stored in database tables.


View the original article here

Densification with OBIEE logical Sql (Sparse to dense data)

You may want to view the data in [[analytic:dense_sparse|dense]] form, with rows for all combination of dimension values displayed even when no fact data exist for them.


And it’s also the most problem that you have when you work with [[analytic:function_time|time series calculations]] as the [[dat:obiee:presentation_service/obiee_period_to_period_lag_lead_function|lag/lead function]], is that the data are not [[analytic/dense_sparse|dense]].


This article show the capability of the [[dat:obiee:logical_sql:|OBIEE logical sql]] to [[analytic:data_densification_sparse_to_dense|densify]] the data. To know more about the Obiee logical Sql, you can also read the good post of [[http://oraclebizint.wordpress.com/2009/05/07/oracle-bi-ee-101341-understanding-logical-sql-part-1/|Venkatakrishnan]].


The sample example come from this article : [[analytic:data_densification_sparse_to_dense]] and the sql below is a translation in [[dat:obiee:logical_sql:|OBIEE logical sql]] of [[analytic:data_densification_sparse_to_dense#densification_with_cross_join_and_outer_join|the densification solution with cross and right outer join]].


As the gold rule is to embedded the difficulties in the repository, I highly recommend this solution instead : [[dat:obiee:bi_server:design:obiee_densification_design_preservation_dimension]].


===== Sparse data to densify =====


A typical situation in the [[database:oracle:sample_schemas|sh schema]] with a sparse dimension is shown in the following example, which computes the weekly sales and year-to-date sales for the product Bounce for weeks 20-30 in 2000 and 2001:


SELECT SUBSTR(p.Prod_Name,1,15) Product_Name,
t.Calendar_Year Year,
t.Calendar_Week_Number Week,
SUM(Amount_Sold) Sales
FROM
Sales s,
Times t,
Products p
WHERE
s.Time_id = t.Time_id AND
s.Prod_id = p.Prod_id AND
p.Prod_name IN (‘Bounce’) AND
t.Calendar_Year IN (2000,2001) AND
t.Calendar_Week_Number BETWEEN 20 AND 30
GROUP BY
p.Prod_Name,
t.Calendar_Year,
t.Calendar_Week_Number
order by
product_name,
year,
week asc


PRODUCT_NAME YEAR WEEK SALES
————— ———- ———- ———-
Bounce 2000 20 801
Bounce 2000 21 4062.24
Bounce 2000 22 2043.16
Bounce 2000 23 2731.14
Bounce 2000 24 4419.36
—- Miss one row for the week 25
—- Miss one row for the week 26
Bounce 2000 27 2297.29
Bounce 2000 28 1443.13
Bounce 2000 29 1927.38
Bounce 2000 30 1927.38
Bounce 2001 20 1483.3
Bounce 2001 21 4184.49
Bounce 2001 22 2609.19
Bounce 2001 23 1416.95
Bounce 2001 24 3149.62
Bounce 2001 25 2645.98
—- Miss one row for the week 26
Bounce 2001 27 2125.12
—- Miss one row for the week 28
Bounce 2001 29 2467.92
Bounce 2001 30 2620.17


In this example, we would expect 22 rows of data (11 weeks each from 2 years) if the data were dense. However we get only 18 rows because weeks 25 and 26 are missing in 2000, and weeks 26 and 28 in 2001.


===== The cross join and the outer join =====


select D.saw_0, D.saw_1, D.saw_2, A.saw_3
FROM
(
SELECT
Products.”Prod Name” saw_0,
Calendar.”Calendar Year” saw_1,
Fiscal.”Fiscal Week Number” saw_2,
“Sales Facts”.”Amount Sold” saw_3
FROM SH
WHERE
(Calendar.”Calendar Year” IN (2000, 2001))
AND (Products.”Prod Name” = ‘Bounce’)
AND (Fiscal.”Fiscal Week Number” BETWEEN 20 AND 30)
) A RIGHT OUTER JOIN
(
SELECT C.saw_0 saw_0, B.saw_0 saw_1, B.saw_1 saw_2 FROM
( Select Calendar.”Calendar Year” saw_0, Fiscal.”Fiscal Week Number” saw_1
FROM SH
WHERE Calendar.”Calendar Year” IN (2000, 2001)
AND Fiscal.”Fiscal Week Number” BETWEEN 20 AND 30 ) B,
( Select Products.”Prod Name” saw_0 FROM SH WHERE Products.”Prod Name” = ‘Bounce’ ) C
) D
ON ( A.saw_0 = D.saw_0 and A.saw_1 = D.saw_1 and A.saw_2 = D.saw_2 )
ORDER BY D.saw_0, D.saw_1, D.saw_2


===== The result in answer =====


{{:dat:obiee:presentation_service:obiee_logical_sql_densification.jpg|}}


===== The result in issue sql =====


In dashboard, Setting / Administration / Issue Sql


{{:dat:obiee:presentation_service:obiee_sh_densification.jpg|}}


View the original article here

Oracle Business Intelligence 11g

Logical Architecture


Oracle Business Intelligence Logical Architecture


Description of Figure 3-1 follows


The Oracle Business Intelligence domain contains three main components: a WebLogic domain, Oracle Business Intelligence System Components, and a database. Each main component is represented in its own rectangle contained within the Oracle Business Intelligence Domain rectangle. The Database component rectangle contains only a database, however the WebLogic domain and Oracle Business Intelligence System Components rectangles contain several subcomponents each.


A typical Oracle Business Intelligence installation consists of a Fusion Middleware home and the following subdirectories:


wlserver_10.3: The WebLogic Server home, which contains Java components, one Administration Server, and one or more Managed Servers.


oracle_home: The Oracle Home contains binary and library files for Oracle BI.


oracle_common: The Oracle Common Home contains the binary and library files required for Fusion Middleware Control and Java Required Files (JRF). There can be only one Oracle Common home within each Middleware home.


Typical Oracle Business Intelligence Directory Structure on a Single host with default values. At the top of the directory structure is the Middleware Home, which contains the Product Oracle Home, the Oracle Common Home, and the WebLogic Home. Notice the domains and instance directories are de-coupled from the MW_HOME and ORACLE_HOME.


Description of Figure 3-2 follows


Ref: Oracle Business Intelligence documentation


View the original article here

Obiee – How to mix string and number data type in one column and get a sum ?

Sometimes, you want to mix number and string data type in one column because you want to send a conditional message :


For instance, :
* if value > 1000, write “To Big” else value
* if value is null, write “No Data” else value


If you write a function, on this way as :


CASE WHEN Measures.”Count Passed” IS NULL THEN ‘No Data’ ELSE Measures.”Count Passed” END


You will have this error :


[nQSError: 10058] A general error has occurred. [nQSError: 22027] Union of non-compatible types. (HY000)
SQL Issued: SELECT “Business Rule”.”Rule Name”, CASE WHEN Measures.”Count Passed” IS NULL THEN ‘No Data’
ELSE Measures.”Count Passed” END, Measures.”Count Passed” FROM “MDM Vendor”
nQSError: 10058 A general error has occurred. nQSError: 22027 Union of non-compatible types. (HY000)


If you have already used a software as crystal report, you can’t mix of course two types of data in one field but you can have two fields one above the other. It’s why I have done in [[dat:obiee:presentation_service:obiee_character_number_in_one_column|this solution]].


But with [[language/css/start|css]], we can go further and have a single column.


How ?
* using the content property of [[language/css/start|css]]
* using the conditional formatting of OBIEE


===== The Content property of Css =====


The [[http://www.w3.org/TR/CSS21/generate.html#content|content]] property allow us to format an HTML element by adding an additional content (string, image, …) to a HTML element.


This property can not be use in an inline style such as :


This is a paragraph with the color blue


because it need a [[http://www.w3.org/TR/CSS21/generate.html#before-after-content|:before or :after pseudo-elements]].


We will therefore add two class in the OBIEE stylesheet.


===== How to add a custom class to the OBIEE Style Sheet =====


First, we will open the file custom.css and add this two class to demonstrate this capabilities.


/* This file is intentionally empty. Styles can be defined in a customized */
/* version of this file placed in the SiebelAnalyticsData/Web/Res folder; */
/* and can then be referenced from the “Custom CSS Style Options” area */
/* within some Siebel Answers Formatting Dialogs. These styles will only */
/* affect HTML content. */


td.ClassIsNull:before { content: “This value is null” }
td.ClassIsGreater:before { content: “This value is greater then zero : ” }


The custom.css file is located in a standard installation in the repertory :
Oracle_BiHomeoc4j_bij2eehomeapplicationsanalyticsanalyticsanalyticsRess_NewFrontiersb_mozilla_4


You can check its location with a right click on a OBIEE dashboardpage, select show source code and search “custom.css”.


In my dashboard, you can see below that the custom.css is located here :
* OBIEEAnalyticsWebSiteRoot/analyticsRes/s_NewFrontiers/b_mozilla_4/custom.css


===== Add a conditional formatting =====


Now that the worst is done, you can add a conditional formatting to the column in its property :


{{:dat:obiee:presentation_service:obiee_conditionnal_formating_class.jpg|}}


===== The Result =====


{{:dat:obiee:presentation_service:obiee_table_mix_number_string_sum.jpg|}}


This solution has one limitation, it works of course only in HTML.


View the original article here

Obiee – Period to period comparison with the analytical function Lag/Lead

During [[http://forums.oracle.com/forums/message.jspa?messageID=3403773#3403773|this thread]] on the Obiee forum, [[http://108obiee.blogspot.com/|Goran]] point out a solution for a period to period comparison with the analytical function lag. It was time for me to drill down in this analytical function and to compare it with the obiee time function : ago.


[[analytic:analytic_functions:analytic_function_lag|lag and lead]] are analytical functions that can be used to get the value of a column in a previous/next row. [[analytic:analytic_functions:analytic_function_lag|More ...]]


**Attention** : Your data must be [[analytic:dense_sparse|dense]] to have a correct result. See the paragraph [[#with_sparse_data|with sparse data]]. If you don’t have [[analytic:dense_sparse|dense]] data, you can always use the [[dat:obiee:presentation_service:obiee_period_to_period_ago_todate|Obiee Ago Function]]


===== Implementation =====
To implement this database function, we need to use the [[dat:obiee:bi_server:design:fact_table:obiee_embedded_database_function|evaluate functions]].


Create a presentation column in an answer (you can also create a logical column in the repository) and enter in the formula screen this code :


EVALUATE(‘LAG(%1,1) over (order by %2)’ as double, “Sales Facts”.”Amount Sold”, Calendar.”Calendar Month Desc”)


And if we select also form the SH schema, the calendar month desc and the amout sold, you obtain :


{{:dat:obiee:presentation_service:obiee_period_to_period_comparison_lag.jpg|}}


You can remark that you have an extra column “Moving sum”. This column contain this formula :


MSUM (“Sales Facts”.”Amount Sold”, 2) – “Sales Facts”.”Amount Sold”


And can be use to perform a period comparison but of course only for one interval. (2000-01 to 2000-02 but not 2000-01 to 2000-03)


===== Log / Performance =====


The total time to run this query is 10 second.


{{:dat:obiee:presentation_service:obiee_lag_log.jpg|}}


Much better than the [[dat:obiee:presentation_service:obiee_period_to_period_ago_todate|obiee ago function]] which perform the same statement in more than 1min36.


Why ? Because principally, Obiee send to the database only one query and don’t care of the [[#with_sparse_data|sparsity of the data]].


select distinct D1.c2 as c1,
D1.c1 as c2,
LAG(D1.c1,1) over (order by D1.c2) as c3
from
(select sum(T245.AMOUNT_SOLD) as c1,
T268.CALENDAR_MONTH_DESC as c2
from
SH.TIMES T268,
SH.SALES T245
where ( T245.TIME_ID = T268.TIME_ID and T268.CALENDAR_YEAR = 2000 )
group by T268.CALENDAR_MONTH_DESC
) D1
order by c1


===== With Sparse Data =====
I use the example of sparse data in this article [[analytic:dense_sparse]] where we would expect 22 rows of data (11 weeks each from 2 years) if the data were [[analytic:dense_sparse|dense]]. However we get only 18 rows because weeks 25 and 26 are missing in 2000, and weeks 26 and 28 in 2001.


And you can see that the lag column don’t give the good value for the previous period because the lag function don’t care about the time scale but the relative positions of year and week.


{{:dat:obiee:presentation_service:obiee_lag_with_sparse_data.jpg|}}


For information, the lag formula column :


EVALUATE(‘LAG(%1,1) over (order by %2, %3)’ as double, “Sales Facts”.”Amount Sold”,
Calendar.”Calendar Year”, Fiscal.”Fiscal Week Number”)


To fill the gap, you have to take the sparse data and do a partitioned outer join with a dense set of time data in SQL. (To know more [[http://download-west.oracle.com/docs/cd/B19306_01/server.102/b14223/analysis.htm#i1014934|Data Densification for Reporting ...]]) and it’s not really realizable in OBIEE with the Business Model Layer, you have to deal with the [[dat:obiee:presentation_service:obiee_direct_database_request]]


View the original article here

Normalizing and loading Excel files using Informatica Powercenter

Sometimes it is a requirement where information is managed in so-called flat files (i.e.: .csv, .xls, etc) which are not user-friendly. The purpose of this article is to explain the process of loading such files in the data warehouse using informatica power center.


Scenario


A sample source file is shown below:


Clipboard01


And the expected result to be loaded into the DW is as below-


2


Solution


One possible way to achieve this is explained below –


In Excel


1 – Define a range in Excel selecting the following area (as can be seen below) and name this “Budget”


Clipboard03


In Windows


2 – Create an ODBC connection to the excel file where you defined the range in the previous point.


In Informatica Powercenter


3 – In Source Analyzer, import a table from the database choosing the ODBC connection defined in the previous point selecting the “Budget” table or the name given to the table in the point 1.


4 – Create a target table with the relevant target fields. Then in Target Designer, import the table where you want to load the data normalized. You can see a simplified version of the table below.


4


5 – In Mapping Designer, create a mapping which should look like the following.


Clipboard05


Tips:


– We’ll use just the first 13th port to link “Source Qualifier” and “Normalize” transformations. (From port called “Sales_Rep” to port called “Dec”, the columns that we want to load into the target table)


6 – Normalizing – Configuring the Transformation


As you can see in the snapshot, we have to create two ports inside the tab called “Normalizer”, one for the Sales Representative and the other for the Budgets.


6


Sales_Rep: is the first column that we have in the Excel file.


Budget: in the option called “occurs”, we have to divide it into 12 columns because it is the number of Budgets per year (monthly budget).


7


In the tab called “Ports” we can see that several ports were generated automatically.


8


7 – Configuring the “Expression”


We have to configure the expression as seen in the snapshot.


9


Tips:


Family_Group: a parameter has to be defined into the mapping, called $$Family and define it as Parameter type, because this mapping will be executed twice, but with different Families (Family1 & Family2)


GCID_Period_OUT: a new column with the following formula has to be created:


DECODE(GCID_Period_IN, 1,’Jan’, 2,’Feb’, 3,’Mar’, 4,’Apr’, 5,’May’, 6,’Jun’, 7,’Jul’, 8,’Aug’, 9,’Sep’, 10,’Oct’, 11,’Nov’,'Dec’)


The values that we have in GCID_Period_IN, is sequential beginning from 1 up to the total number of occurrences (in this case 12) defined in point 6 which are basically the number of months.


In Workflow Manager


8 – Configuring the workflow


As can be seen in the snapshot below, the same mapping will be executed twice, taking into account the following configurations.


10


Session Configurations:


The first session:


The Parameter Filename has to be set (paramfile_Family1.txt, which should be defined inside by the following parameter: $$Family = ‘Family1’


The second session:


Another Parameter Filename has to be set (paramfile_Family1.txt, which should be defined by the following parameters, $$Family = ‘Family2’ and VERY IMPORTANT, we have to override the SQL query into the session using the following:


text


11


Basically, you are changing the source columns to load into the second session, the Family2’s budget, as can be seen in the following diagram.


Clipboard012


View the original article here

Obiee – A special subject area to handle the dashboard parameters prompts


All the prompts in OBIEE are column based prompt. You can’t create a prompt if you don’t select a column. And as it’s the only way to set up a variable for a formula, it’s impossible to bypass this constraint.


In our case, we don’t care about the value in the dimension column as we want parameter values as for instance the hierarchy level :


{{:dat:obiee:presentation_service:obiee_parameter_prompt_result.jpg|}}


The idea behind the scene is :
– to create a column which is on the top of a dual view (or skinny table) in the physical layer.
– to create a dummy business model because BI Server requires us to have a minimal of one logical join.
– to create a special subject area (presentation catalogue) to separate the functional of the parameters columns
– to be able to choose this column in order to create one or several others parameter prompts.


The advantages of this solutions are that :
* as you query a skinny table (or dual view), the performance are very good
* as you use a column, you can translate in other languages the label of the parameter prompt
* you can add a parameter value without changing the original dashboard prompt


===== Creation of the Parameter Table =====


In this example, we show the creation of a parameter table with a dual view but you can choose to create a table to store your parameters.


* In the physical layer, right click on a physical schema and choose New Physical Table
* select “Select” as Table Type from the drop down menu
* and enter the Sql below


Example :


SELECT ‘MONTH’ AS REPORT_LEVEL FROM DUAL
UNION
SELECT ‘QUARTER’ AS REPORT_LEVEL FROM DUAL


{{:dat:obiee:presentation_service:obiee_dummy_table.jpg|}}


Second, you need to create the column report_level from the sql statement.
* click on the column tab and create it


{{:dat:obiee:presentation_service:obiee_dummy_table_columns.jpg|}}


If you choose this column in a query, the values MONTH and QUARTER will be returned.


===== Creation of the Business Model Layer =====
* Drag and drop **TWO** times this table in order to create two logical table source :
* Parameters1
* Parameters2
* Select this two tables,
* Right click / Business Model Diagramm / Selected Tables only
{{:dat:obiee:presentation_service:obiee_dummy_business_model.jpg|}}
* and create a new complex join between them.
{{:dat:obiee:presentation_service:obiee_dummy_model_2.jpg|}}


This step is important beacause Obiee require that a fact table has minimum one complex logical join


===== Creation of the Presentation Catalog =====
* Right click in the presentation layer / New Presentation Catalog and name it Parameter
* Just drag and drop one of the two logical table and you are done.
* You can cache this new presentation catalog to the others users by giving the correct privilege. In the Oracle BI Presentation Dashboard / Administration / Manage Privileges.
* Reload the metadata in the BI Presentation Dashboard in Administration / Reload Files and metadata


{{:dat:obiee:presentation_service:obiee_parameter_subject_privilege.jpg|}}


In the picture above, you can see that only the Presentation Server Administrator have the right to the Parameter Area but everybody can use a object (report, prompt) create with it


===== Creation of the dashboard prompt =====


Now that we have our parameter column in our parameter subject area, it’s possible to choose it in order to create a parameter prompt.


* Go to answer
* Click on the icon : New Dashboard prompt on the left side
* And select the subject area Parameter
{{:dat:obiee:presentation_service:obiee_new_dashboard_prompt.jpg|}}
* in the left frame, select the column of the select table (in our case report_level)
* and define the options that you need as the setting of a presentation variable
{{:dat:obiee:presentation_service:obiee_parameter_prompt.jpg|}}
* and you get :
{{:dat:obiee:presentation_service:obiee_parameter_prompt_result.jpg|}}


===== What about now if I don’t want MONTH and QUARTER but MONTH and YEAR ? =====


You can change the values in your parameter table or you can use the SQL value capabilities of the prompt :
* Go back to your prompt
* select SQL Value in the show result
* and tape this SQL :


SELECT CASE WHEN 1=0 THEN Parameters.REPORT_LEVEL ELSE ‘MONTH’ END FROM Parameter
UNION
SELECT CASE WHEN 1=0 THEN Parameters.REPORT_LEVEL ELSE ‘YEAR’ END FROM Parameter


As one is always different of zero, you will obtain MONTH and YEAR as value in the drop down list.


You can not enter this SQL :


SELECT ‘MONTH’ FROM Parameter
UNION
SELECT ‘YEAR’ FROM Parameter


because Parameter describe a presentation catalog and not a table. In the Sql of OBIEE, you really need to have for each column the name of the table otherwise you will obtain this error :


Error Codes: OPR4ONWY:U9IM8TAC:OI2DL65P
State: HY000. Code: 10058. [NQODBC] [SQL_STATE: HY000] [nQSError: 10058] A general error has occurred.
[nQSError: 42021] The query does not reference any tables. (HY000)
SQL Issued: SELECT ‘MONTH’ FROM Parameter


===== Performance =====
As we use a dual or a skinny table as source table, the performance are really good.


===== Conclusion =====
You can add to your parameter subject area one column by parameter or you can change the values with the SQL capabilities from the prompt. In the two case, a sql statement against a little table of Oracle is performed and doesn’t therefore require to read data by an I/O operation on a disk. You can therefore choose your preferred solution but keep in mind that one column for one dashboard prompt is the natural Obiee mechanism and permit a good translation in other languages.


View the original article here

Thursday 7 April 2011

OBIEE Presentation Layer Design Principles/Best Practices

www.obieefans.com

Principle 1.Subject Areas
Do not include all presentation layer objects in a single subject area (Presentation Catalog). While it is possible but still not recommended approach.
Principle 2. Development with End Users in Mind
Always develop the presentation layer so that end users are able to understand and use it.
Principle 3. Role Based Subject Area.
It is always good idea to create presentation catalog to suit the needs of individual users or user types. For ex. create a separate presentation catalog for sales managers because they need to see only an overview of an organization.
Principle 4. Presentation Tables

Presentation Tables should consistent across presentation catalog.
  • List Dimension tables first.
  • Do not mix dimension and fact columns in the same table.
  • Apply consistent ordering and naming conventions for tables and columns across catalogs.
  • Include the words “measure” or “fact” in the names of the fact presentation tables.
Principle 5. Rule of Seven
Keep presentation catalogs small and easy to understand by limiting the number of tables to seven.
Keep Presentation catalogs small and easy to understand by limiting the number of columns to seven.
Principle 6. Fact Tables
Try to limit the presentation catalogs so that there are no more than a couple of fact presentation tables in each catalog. It is important to avoid situation in which there are multiple join paths existing within one presentation catalog.
Principle 7. Implicit Fact Columns
If you have multiple fact presentation tables, it is always best practice to assign an implicit fact column. Implicit facts come into play when an Answers report contains columns from more than one logical dimension table and no explicit facts.
Principle 8. Canonical Time
Canonical time is a useful way for allowing users to report for a specific period of time across multiple star schema. If you use canonical time ,make sure that the corresponding time presentation table is given a very generic  name and that name is consistent across all the presentation catalogs.
It should be the first table in a catalog.
Principle 9. Secondary Time Dimension
This function enables users to build time reports for specific star schema.
Secondary time dimensions can be given their own presentation tables further down the list.We can place all secondary time dimension objects into a single presentation table.
Principle 10. Nesting Presentation Table
Prefix presentation table names with a hyphen to group common objects together into sub folders.
Principle 11. Presentation Object Names & Description
  • Use the Alisa tab to keep track of prior names.
  • Use the default option that synchronize the presentation column name with the underlying logical column name.
  • Use only logical, business -oriented names ( rather than physical object names) in the presentation Layer.

OBIEE BMM Layer Design Principles/Best Practices

www.obieefans.com 


OBIEE BMM Layer Design Principles / Best Practices
There are certain design principles or best practices oracle suggest in designing the OBIEE repository. If you open any standard/sample repository provided by oracle you will understand what exactly I am talking about
Today we will discuss the design principles for BMM Layer.
Principle 1. Use Multi User Development Environment
Use the Multi- User Development  facility if there are multiple developers. Multiple developers to connect “online” to the same repository file and making changes is not recommended.
Multi User Development allows user to define a series of projects within the repository file ,where each project is a subset of the entire repository .If developers want to make changes , they can check out a project to a local machine make and test the changes,and then check the modifications back into the master repository file.
Principle 2.  Always run Global Consistency Check before releasing a repository.
Whenever we make changes to a repository ,always be sure to run Global consistency check. It is bad practice to release a repository that still contains consistency check errors. In some cases, consistency errors prevent Oracle BI Server from loading the repository. Use the Consistency check manager to identify and debug check messages.
Principle 3.  Separate Business Model
Even if you have only a single data source or schema in the physical layer, or you have only one physical data source for the repository, it is still good practice to break out the physical objects into multiple business models in the BMM layer to represent the independent areas of functionality.
Principle 4. Logical Tables
When building logical tables, do not merge multiple dimension tables into a single logical dimension table,and do not merge multiple fact tables into a single logical fact table.
Having multiple logical fact tables also makes it easier to create well defined projects for Multi User development.
It is also a good practice to prefix logical table names with either Dim-, Fact- ,or Fact Compound -.
This allows you to easily see how the tables are being used. It also groups the tables in the business model, so that facts are groups with facts, dimensions with dimensions  and so on.
Principle 5. Time Dimension
There are few things to keep in mind in time dimension factor.
  • Always must ensure that time Dimension hierarchy is built correctly and the logical level of each time- logical table source is set correctly
  • If there are multiple time dimensions within the business model, for consistency, make sure that all time dimension logical table contains the same columns and general structure. This is good for reporting purpose.
Principle 6. Logical Fact & Dimension table columns
  • Always assign a primary key for logical dimension tables. All logical dimension columns should be renamed in a way that is meaningful to users.
  • Bring only required columns in to the BMM layer for reporting.
  • Do not assign logical primary key for logical fact tables.
  • Create meaningful name for measures
  • Set aggregation rule for every logical fact columns.
  • Create “dummy” measures to group facts.
Principle 7. Logical Joins
Use only logical(complex ) joins in BMM layer. And always accept default properties when creating joins.

Principle 8. Calculated Measure
Be very careful when building calculated measures.
  • Use logical columns for calculations that require an aggregation rule that is applied before the calculation.
  • Use physical columns for calculations that require an aggregation rule to be applied after the calculation.
Principle 9. Aggregates
Few important things to keep in mind about Aggregates.
  • Try to ensure that each aggregate table has an effective summary ration with underlying detail.
  • Ensure that the logical level of every aggregate logical table source is set correctly.
  • Always test to ensure that aggregates tables are being used as expected.
  • If an aggregates is not used ,try changing the number of elements on one of the related logical dimension levels.
Principle 10. Dimension Hierarchies
In Dimension Hierarchies few things  are very important to keep in mind
  • It is best practice to create dimensional hierarchy for every logical dimension table in BMM layer.
  • All Dimension must have at least two levels : the total level and detail level.
  • If you are creating Dimensional Hierarchy manually, be sure to check Grand total level for the Total Level.
  • Use Update Row Counts or Estimate Levels to set the number of elements for every level of every Dimension Hierarchy.
  • Think about the experience of user when enabling drill down.
Principle 11. Avoid Snowflake schema
When there is Snowflaking in physical model,We should try to avoid Snowflaking in BMM layer and build models that use only star schema .

Use WHERE clause filters to help avoid using opaque views or complex joins in the physical layer.

OBIEE Physical Layer Design Principles/Best Practices

There are certain design principles or best practices oracle suggest in designing the OBIEE repository. If you open any standard/sample repository provided by oracle you will understand what exactly I am talking about
Today we will discuss the design principles for physical layers
Principle 1 :Import only needed tables in physical layer and do not create tables manually in physical layer.
Import Tables
Import Tables
Reasons to do that :Its easier to import the table then creating it manually.In that way we are avoiding the table name , column name , data type mis match possibility. Import only those tables which you need. If you need more tables at later stage in project, you can always import them.
You will be using connection pool to import the table and that helps to make sure that connectivity to source database system is working fine.
Principle 2 Create alias for the physical tables
Physical Layer Alias Table
Reasons to do that :
It helps in avoiding the circular joins.
It helps when we have confirm dimension(e.f time dimension) and we want to join dimension different way
Its easier to give the access of objects to users in case of Multi User Development Environment
Alias naming convention helps in easily finding the fact and dimension table in physical layer
We can import the key relationship in physical layer from database and maintain the relationship which is required among the alias tables
Principle 3 Set the cache  property of the physical table
Cache Property of the tables
Reasons to do that
Its better to set the caching at physical table level and not at the alias table level.This applies to most of the scenarios
It your data source is OLTP system make sure you disable to caching. As  that changing frequency would be high and you do not want to cache results.
For all the data warehouse sources have better cache persistence time set
Principle 4 connection pool(s) and its properties
Physical Layer Multiple connection Pool
Reasons to do this.
To have multiple connection pool for difference purpose. e.g for usage tracking, security implementation etc it better to have different connection pools.
COnnection Pool Property
Call interface: Use native call interface for the connection(e.g OCI10g) etc based on source database. Its faster then generic ODBC connection.
set connection pool , time out ,maximum connections etc based on server configurations and usage
connection pooling- it avoids the database connection overhead. If users run the same query it users the same connection from the pool. What does this mean is user sessions share the connection in this.
Maximum Connection :
Max what it should be :Approx 1024 kb of server memory is consumed in each connection.So tThis has to be set per server configuration and requirement.
Min what it should be: 25% of max users times the reports they execute.
e.g if you have 1000 users accessing around 10 reports  in dashboard that this number should 250 ( 25% of 1000) * 10 = 2500

“Account is locked by OCI call ... Could not connect to Oracle database”

 www.obieefans.com

Q: When I try to run a query in Answers I get “the account is locked at OCI call OCILogon”?

This can happen for various reasons – for example, when trying to rename a repository that is currently online.  You may get the error message:

*  ORA-28000: the account is locked at OCI call OCLogon. [nQSError: 17014] Could not connect to Oracle database. (HY000)

or even just the “Could not connect” component of it.  What’s surprising is that the account that is locked has nothing to do with OBIEE.  It’s the Oracle database schema used by the “Connection Pool” within the repository – account “sh” in the case of the tutorials.

Logon to SQL*Plus as “sys” or “system” and issue the command:

*  alter user <user name> account unlock;

Unfortunately, this error seems to tie the entire OBIEE configuration up in “knots”, so you may well have to reboot the system to get “Answers” up and working again.

OBIEE not working

www.obieefans.com 

When you boot the system sometimes the “Automatic” processes start, and sometimes they don’t.  Stop a process, change a parameter, and sometimes you can’t get it to restart.

Whenever you’re stuck make sure you do the following.  First turn any firewalls or anti-virus checkers off: it's possible for OBIEE to work perfectly well with these until an error occurs; but in order to clear the error you may have to turn them off.  Then set all the BI processes to “Manual”, perform a hard-reboot of the system, and then start the processes up in the following order:

*  Oracle BI Server
*  Oracle BI Presentation Services
*  Oracle BI Java Host
*  Oracle BI Scheduler
*  Oracle BI Cluster Controller (only in a cluster configuration)

If this doesn’t work then repeat the hard-reboot several times – it's quite common to find, say, that the first two reboots don't work, but the system comes up on the third attempt!

If rebooting doesn’t work then restore all the configuration files to their installation values after saving the current configuration files – you were, of course, wise enough to keep copies of the original configuration files, now weren’t you?  If OBIEE works with the original configuration files, then there’s something about the new configuration files that is causing the problem.  Re-implement them in stages until you find the source of the problem.

But if OBIEE doesn’t work with the original configuration files, then the problem is due to some change to the Windows, OBIEE, or other application software installed on the machine.  Restore all software and configuration files that were present when you first installed OBIEE (and it worked) – from the image backup you were prescient enough to make at the time.  Then incrementally add the changes to the software that you’ve made since the OBIEE installation.  When you’ve found the software change that’s causing the problem, then restore the system to its current configuration – using the image backup you’ve just made of the current configuration, of course.  Then fix the software problem in the current version.


“SQL Statement preparation failed”

www.obieefans.com 


Q: When I try to run the usage tracking request in Presentation Services I get an error, “SQL Statement preparation failed”?

Another little Oracle oopsie.

This bug takes a little bit of detective work.  Now you may remember that towards the beginning of the tutorial you were asked to change the name of “LOGIN” to “USER_NAME” in script “SQLServer_create_nQ_UserGroup.sql” since “LOGIN” is an Oracle reserved word (despite the fact that you’ve just run several Oracle specific setup scripts, you now have to modify a script intended for SQLServer, which says wonders about the care Oracle has taken in preparing and testing the contents of its OBIEE distribution).  In any case, with this change in place the view created by the script, “NQ_LOGIN_GROUP”, has two columns “USER_NAME” and “RESP”.

If you open the repository “sh_usagetracking.rpd” with the Administration Tool and, in the Physical layer, navigate to “OBI Usage Tracking => Catalog => dbo” you’ll find that “NQ_LOGIN_GROUP” also has two columns.  One is “RESP”, but the other is ... can you guess ... “LOGIN” – not “USER_NAME”.  So the BI Server is asking the database for the value of column “LOGIN”, but the database is saying in response, “Sorry, Guv, we don’t hav’ one of them”, or, in other words, “SQL Statement preparation failed”.

So while the tutorial has asked you to update the column in the view creation script, it has supplied you with a repository in which the corresponding change has not been made, and the instructions for editing the repository in the tutorial fail to mention that this change needs to be made.  So just rename column “LOGIN” to “USER_NAME”, save the repository, and restart the BI Server.  Then, fingers crossed, all will be well.

“Unable to connect to port 9705 on machine localhost”

www.obieefans.com  
 

Q: When I click OK in the Machine Name window I get an “Unable to connect to port 9705 on machine localhost”?

The instructions early on in the tutorial ask you to start the BI Presentation Services and the BI Server, but they forget to tell you to start the BI Scheduler – that’s what the Job Manager was expecting to find on port 9705, but didn’t.

“SH.zip” for “MUDE” tutorial has gone “AWOL”

www.obieefans.com  
 

Q: I can’t download file SH.zip for the MUDE (Multi User Development Environment) tutorial.  I’m getting “file not found”?

Well, yes, it seems that this particular “SH.zip” has gone “AWOL” at present.  Fortunately, the “SH.zip” file that you need for this tutorial is the same as that used for tutorial one, “Creating Interactive Dashboards and Using Oracle Business Intelligence Answers”, and for tutorial three, “Installing the Oracle Business Intelligence Suite Enterprise Edition on Windows”, even though it comes ... or would come if the link wasn’t broken ... from a different location.

Could not connect due to missing username/password

www.obieefans.com 


Q: When I use the repository from the second half of the repository tutorial and I try to update the row counts it says it can’t connect due to an invalid username/password?

The repository supplied with this tutorial assumes that the password for account “sh” is “sh”.  But it’s quite likely that your DBA has changed the password from the default when he unlocked the account during the installation of the database.  If this is the case change the password for the connection to match the one you currently use.  Expand the “SH” node in the “Physical Layer”, select “Connection Pool”, right-click “Properties”, and set the “Password” field to the appropriate value.

Global Consistency Check: no warnings for missing keys

www.obieefans.com 


Q: When I do the global consistency check in the repository tutorial I don’t get the warnings about no keys being defined as in the tutorial.  If I look in the physical layer then the tables don’t have keys so why are the warnings missing?

They’re missing because by default the global consistency check doesn’t test for “Best Practice” messages – something the tutorial forgot to tell you.  To enable these messages, from the “Consistency Check Manager” (where the warnings and messages are displayed), select the “Options” tab, click on the “Best Practice” node, and then press the “Enable” button at the bottom of the screen.  Click on the “Messages” tab, and then on the “Check All Objects” button.  Now the two “Best Practice” messages about the missing keys should appear.

Global Consistency Check: Database features do not match the defaults

www.obieefans.com 


Q: When I do the global consistency check in the repository tutorial I get a warning saying that the database features do not match the defaults.  What does this mean?

Even if you have followed the tutorial correctly, you will get the warning message:

*  [39028] The features in Database ‘SH’ do not match the defaults. This can cause query problems.

when you do a global consistency check.  This warning is not shown or discussed in the tutorial.

The BI Server has to be able to generate optimized SQL for a wide variety of data sources.  To do this it needs to know what features each data source, typically a database, possesses; for example, some data sources will support an “outer join” and some will not.  This information is called the set of “default database features” (it’s stored in configuration file “DBFeatures.ini” in directory “<oraclebi home>\server\config”).  If you right-click on “SH” in the “Physical Layer”, select “Properties”, and then the “Features” tab you’ll see the list of default checkboxes, ticked or unticked, under the “Default” column heading on the right hand side.  Next to it will be another similar column with a heading of “Value”.  It’s possible to override the defaults by checking or unchecking the value checkboxes.  If the two lists don’t match then you’ll get the above error message when you do a global consistency check.  If the current values are more restrictive than the defaults then queries will work, but they may not be as performance efficient as they might be.  If the current values are less restrictive than the defaults then the query sent to the database might be unsupported, leading to an error or to an invalid result set.  So unless there is a very good reason, the current values should match the defaults (one reason for changing them might be that minor releases of the same database version might support different features or have bugs in specific features).  The “Revert to defaults” button at the bottom of the screen can be used to reset the current values to the defaults, and eliminate the warning message.

Now to explain why you are getting the error message, and why there is an issue of far greater importance that is missing from the tutorial.  Edit file “DBFeatures.ini” using “Notepad”.  Search for “ORACLE_80”.  Note in the section beginning “IS_LEFT_OUTER_JOIN_SUPPORTED” that the left outer join is the only type of outer join supported.  Now search for “ORACLE_10g_R2” and you’ll see that all four types of outer join are supported.

Right click on the “SH” node in the “Physical Layer” and select “Properties”.  Select the “General” tab.  You’ll see the value of “Database” listed as “Oracle 8i”.  Now click on the “Features” tab.  You’ll see that the join attributes, both current and default, correspond to an “Oracle 8i” Database.  If you scroll down the list of features you’ll see a mismatch in places, such as in “ODBC API Conformance”.  The import uses the ODBC data source and uses some of the information it provides to update some of the current values, leading to a mismatch with the defaults – which explains why you are getting the warning message.  Press “Revert to defaults”, press “OK”, and then retry the global consistency check.  You’ll find that the warning message has disappeared.

If you’ve followed the above you should have a question, and it’s a very important one with regards to performance.  If you were to use this repository as a production repository – as can happen – then you would be restricting the SQL sent to your Oracle 10g/11g database to Oracle 8i SQL constructs, which would lead to a significant degradation in performance (note that setting the “Call interface” field in the “Connection Pool” to “OCI 10g/11g” as you did at the start of the tutorial has no affect on the database features held in the repository).

Select the “General” tab from the “SH” properties as before and select the “Oracle 10g R2/11g” value from the “Database” LOV.  Click on the “Features” tab.  You’ll find that both the current values and the defaults have been set to the “ORACLE_10g_R2” values that you found in the configuration file (all four join types are supported).  Press “OK”.  Try the global consistency check as before and the warning will not appear, but this time you’ll be using all the features that your database can support.


Can’t log back into repository tutorial

www.obieefans.com 


Q: I took a break after the first section of the repository tutorial.  I saved it and now I’m trying to log in again.  I presume the repository must be opened offline since the server is down.  But when I try to login as Administrator/ Administrator the login fails?

Yes, the issue of passwords in the tutorials can be misleading.  Elsewhere, such as when logging into the Presentation Services, you use “Administrator” as the password, but here you don’t.  Just leave the password field blank and you should be able to log back in and continue with the tutorial.


cannot start BI server -- control request exception

www.obieefans.com


Q: I’ve installed OBIEE and got it working okay.  Then I started on the repository tutorial and now I can’t bring the server up.  I get a control request exception?

The error message you’re getting is probably:

*  Error 1064: An exception occurred in the service when handling a control request

which is not very informative.  You’ll get this message for a variety of reasons.  I think in your case it’s likely to be because of an incompletely defined repository.  When you attempt to bring up the BI Server it will first read file “NQSConfig.ini” from directory “<oraclebi home>\server\config”.  This configuration file will contain the name of the default repository.  The BI Server will then read the contents of that repository.  But if the repository is corrupted or incomplete then the BI Server will refuse to start and you’ll get the above error message.

As part of the installation tutorial a repository “sh.prd” is provided to test that everything is working correctly.  This is a completely defined repository which is why you could bring the BI Server up in the past.  But in the repository tutorial you create file “sh.rpd” from scratch.  Unless you’ve finished the tutorial, you’ll have a partially defined repository, so the BI Server will refuse to start.

Edit file “NQSConfig.ini” and change the repository name to “paint.rpd” or “samplesales.rpd” (first check that the repository you select is present in “<oraclebi home>\server\repository”).  Then you should be able to bring the BI Server back up.

To confirm that an incompletely defined repository is the cause of the problem look in the BI Server log file, “NQServer.log”, in directory “<oraclebi home>\server\log”.  You’ll probably see something like:

*  [nQSError: 15014] No subject area is available in the repository Star.

The error messages that appear in the log files are sometimes more informative than those that appear on the screen.

Just use the Administration Tool to complete the repository tutorial.  Then switch the repository name in “NQSConfig.ini” back to “sh.prd”.